How I expanded my LUKS and LV (Logical Volumes) partitions
I used to dual boot in a 1 TB nvme, but it was almost full so I got a new nvme disk of 2TB. And I wanted to use the new disk only for Linux and the old one for Windows.
lsblk looked like this:
1
2
3
4
5
6
7
8
9
10
11
12
13
lsblk
NAME                MAJ:MIN RM   SIZE RO TYPE  MOUNTPOINTS
nvme0n1             259:0    0   1.8T  0 disk
nvme1n1             259:1    0 931.5G  0 disk
├─nvme1n1p1         259:2    0   100M  0 part  /boot/efi
├─nvme1n1p2         259:3    0    16M  0 part
├─nvme1n1p3         259:4    0   200G  0 part
├─nvme1n1p4         259:5    0     2G  0 part  /boot
├─nvme1n1p5         259:6    0 728.9G  0 part
│ └─nvme0n1p5_crypt 253:0    0 728.9G  0 crypt
│   ├─debian-root   253:1    0  83.8G  0 lvm   /
│   └─debian-home   253:2    0 645.1G  0 lvm   /home
└─nvme1n1p6         259:7    0   509M  0 part
nvme0n1was the new onenvme1n1was old onenvme1n1p5was a LUKS partition and inside it had two LV.
Remember to backup your data first
Preparations steps
The first thing to do was to create the partitions in the new disk. As I would clone the older partition, the new ones needed to be at least as big as the old ones.
To create the partitions I decided to use KDE Partition manager, but any other program
(like fdisk or gparted) should have worked just fine.
 The disk was new, there is no partition table
I clicked New Partition Table button.
Then the New Partition button on the left to create the partitios I needed.
In the Pending Operation section at the bottom, you can see what the program is about
to do. Finally I clicked Apply.
Creating a new table partion will erase your data, make sure you select the correct disk.
Now it looked like this:
 The disk has some partitions now
After that, I was ready for the cloning part, I decided to use Rescuezilla which is GUI to clonezilla for the task.
First I downloaded the Rescuezilla iso image from here.
Then I needed to burn it in a usb drive, for this I used balena-etcher 1 because it is really easy to use.
I only had to unzip the balena zip file and everything I needed is there. To start it I ran ./balena-etcher inside the balena folder.
I selected the iso and the usb drive, this is how it looked.
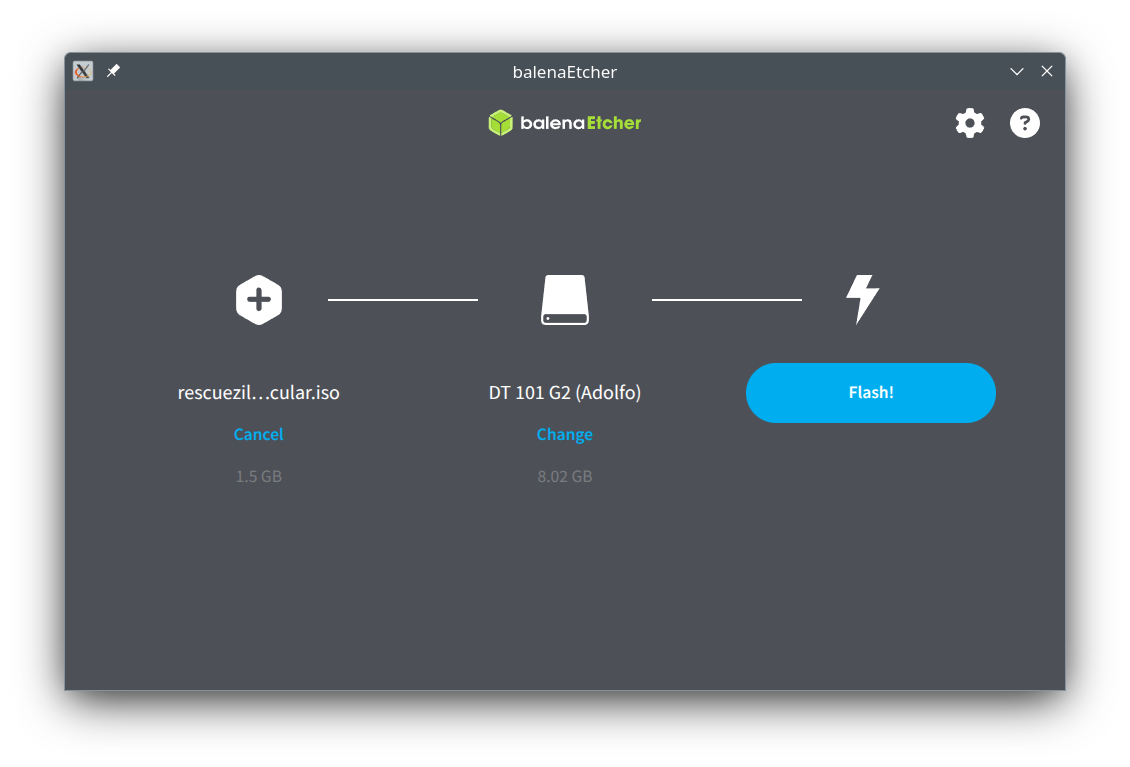 Balena window
Before flash make sure you select the correct drive.
Then, clicked flash.
Cloning the partitions
The good thing is Rescuezilla is based on Ubuntu, it would be really easy to run any additional command I could need.
The plan consisted on the following:
- Clone the partitions to the new disk.
- Resize the LUKS partition and the VG under it.
- Make sure I can mount the partitions and everything is ok.
- Change the UUID of the old
/bootand the old LUKS, so they won’t be mounted when I restart my PC. - Profit!
These were the UUID of the old disk
1
2
3
4
5
6
7
8
9
10
nvme1n1
├─nvme1n1p1         vfat        FAT32                        CA0E-4D9E                                63.3M    34% /boot/efi
├─nvme1n1p2
├─nvme1n1p3         ntfs                                     D2A60EAEA60E92E1
├─nvme1n1p4         ext4        1.0                          1142f508-b892-4bca-b0cc-ab1accdf9db9      1.3G    26% /boot
├─nvme1n1p5         crypto_LUKS 2                            2a659480-bf29-4944-9d52-6d078bdfd346
│ └─nvme0n1p5_crypt LVM2_member LVM2 001                     bPQHVr-kxof-cEZL-0eDN-XYEd-tYQY-PJBY6a
│   ├─debian-root   ext4        1.0                          274d68b8-66af-4652-a23e-b4e05ce6d4a8     26.1G    63% /
│   └─debian-home   ext4        1.0                          aeeb4963-7f46-4eb8-8353-2b955efcc6f3    240.4G    57% /home
└─nvme1n1p6         ntfs                                     F44234364233FC44
After Rescuezilla booted I was welcome with this:
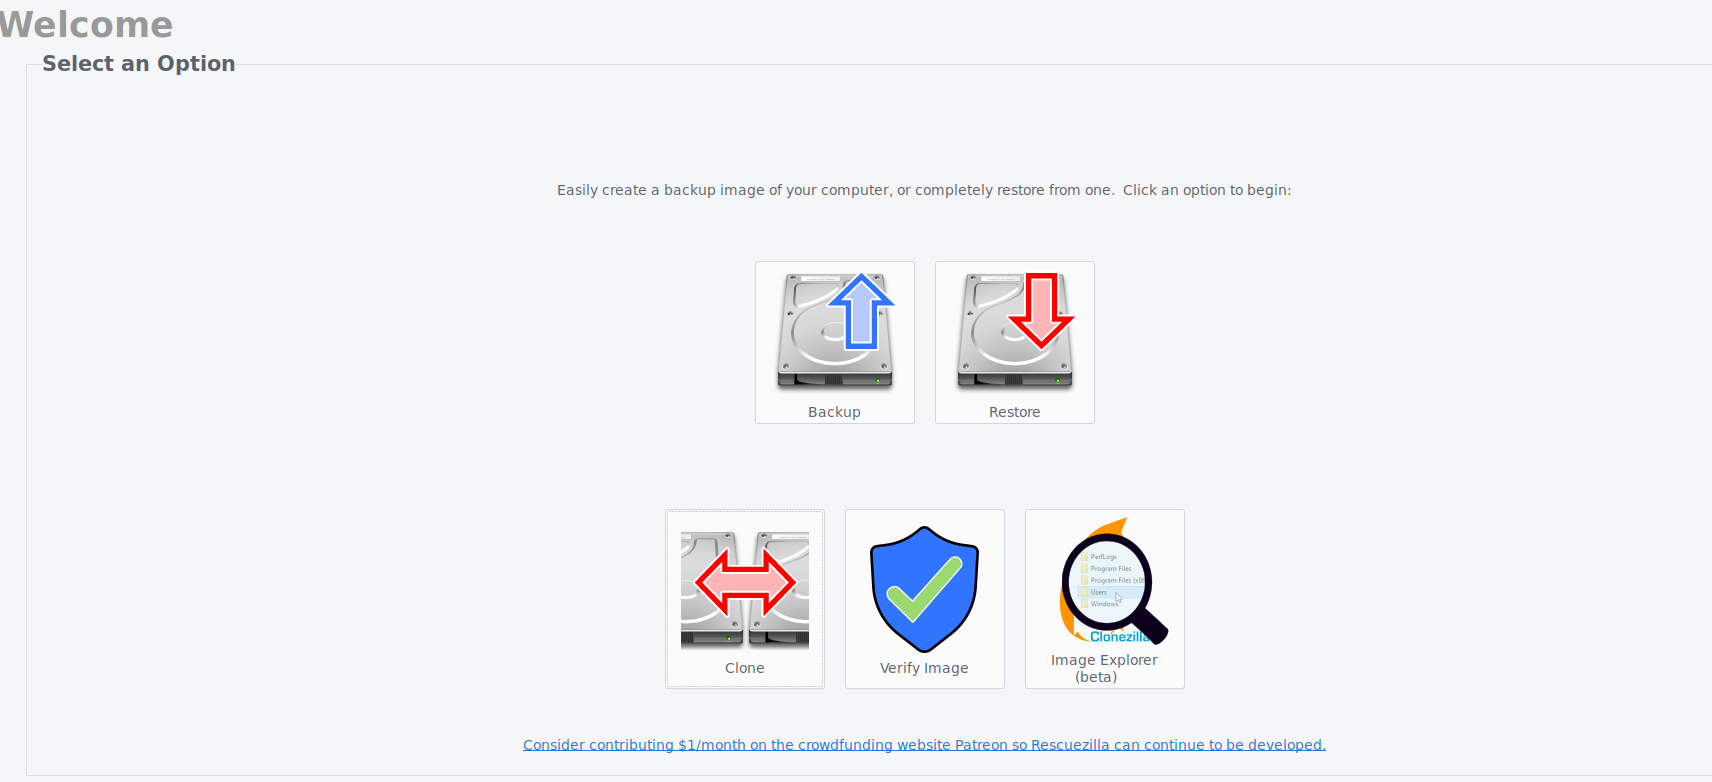 Rescuezilla Main Menu
- I clicked
Clone - It asked me for the source and destination disks.
-
I selected the 3 partitions I wanted to clone and unchecked the
Overwrite the partition tablebutton to be able to select the final partition on the final disk.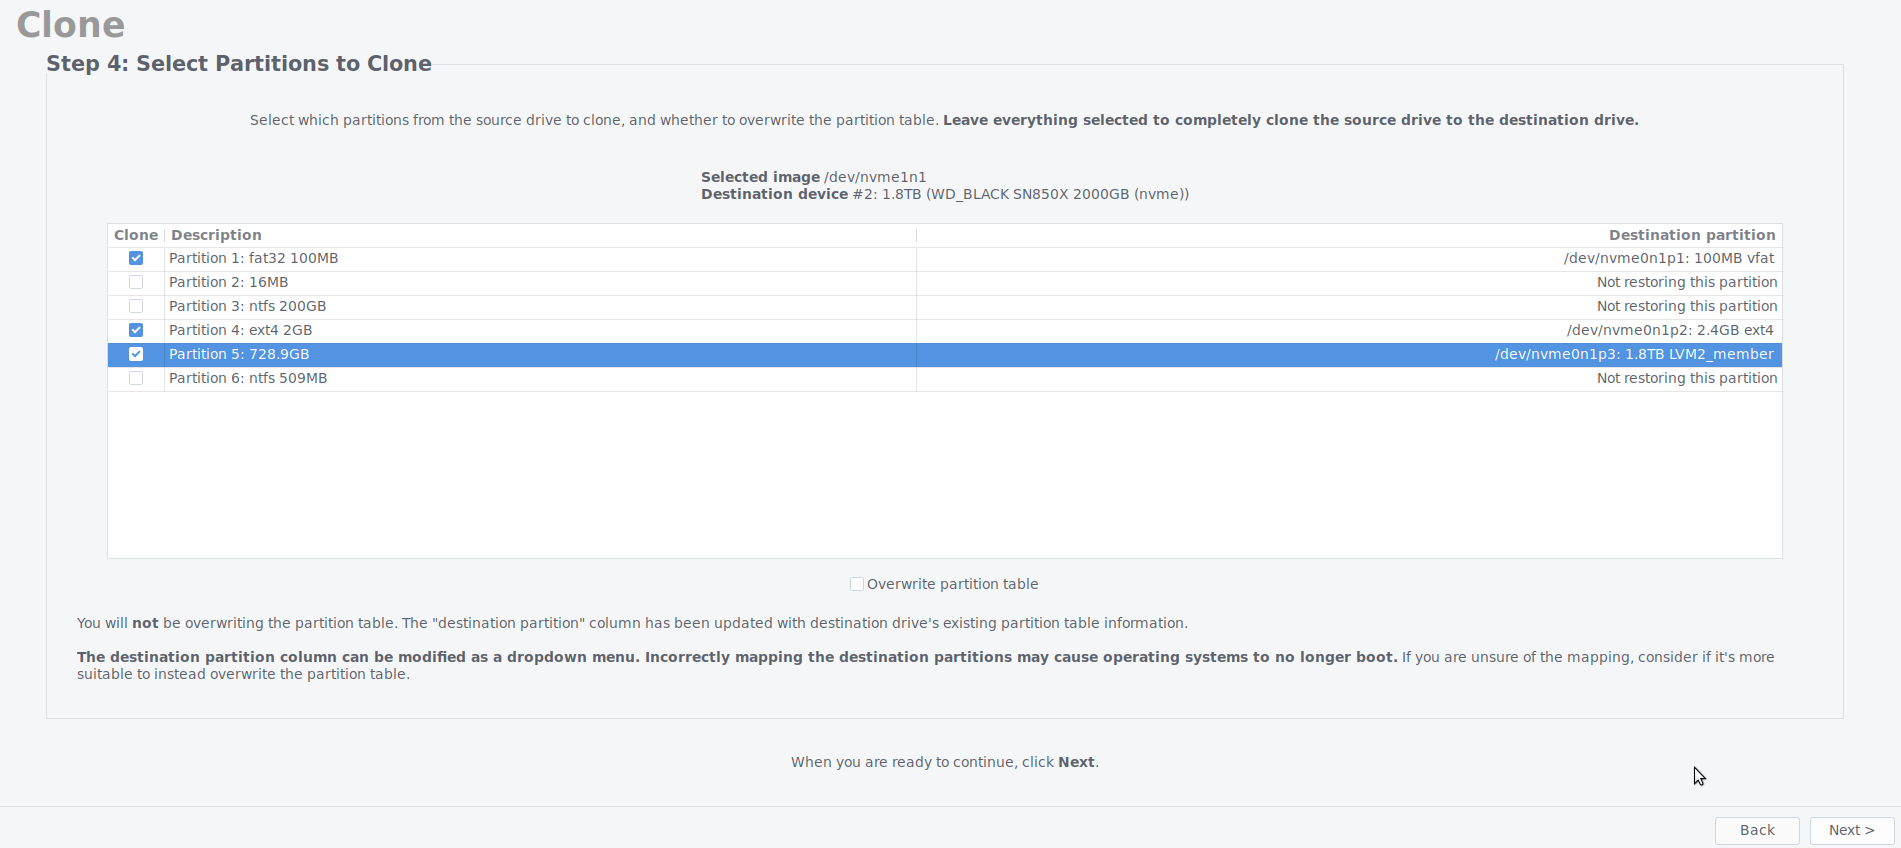 Rescuezilla partitions to be cloned
 - I saw the plan and confirmed it.
- I waited while it was doing its work.
- I got an empty window for some reason, but it finished and it showed the summary of the operation.
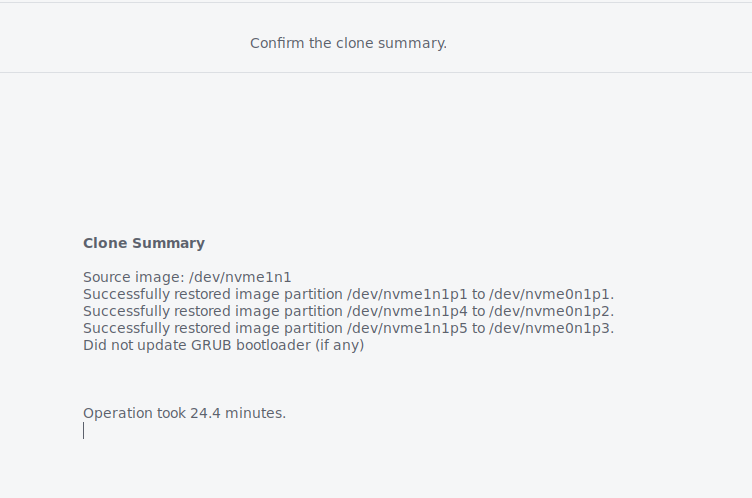 Rescuezilla operation summary
Resizing
I proceeded to resize stuff, lsblk -f showed me this:
1
2
3
4
5
6
7
8
9
10
11
nvme0n1
├─nvme0n1p1 vfat        FAT32                        CA0E-4D9E
├─nvme0n1p2 ext4        1.0                          1142f508-b892-4bca-b0cc-ab1accdf9db9
└─nvme0n1p3 crypto_LUKS 2                            2a659480-bf29-4944-9d52-6d078bdfd346
nvme1n1
├─nvme1n1p1 vfat        FAT32                        CA0E-4D9E
├─nvme1n1p2
├─nvme1n1p3 ntfs                                     D2A60EAEA60E92E1
├─nvme1n1p4 ext4        1.0                          1142f508-b892-4bca-b0cc-ab1accdf9db9
├─nvme1n1p5 crypto_LUKS 2                            2a659480-bf29-4944-9d52-6d078bdfd346
└─nvme1n1p6 ntfs                                     F44234364233FC44
As expected, the partitions had the same UUID.
First checked the new partitions (/boot and /boot/efi)
The EFI partition
1
2
3
4
fsck /dev/nvme0n1p1
fsck from util-linux 2.40.2
fsck.fat 4.2 (2021-01-31)
/dev/nvme0n1p1: 192 files, 33451/98304 clusters
I checked the size too:
1
2
fdisk -s /dev/nvme0n1p1
102400
(102400 / 1024 = 100MiB)
1
2
3
4
5
6
7
fatresize -i /dev/nvme0n1p1
fatresize 1.1.0 (20240401)
part(start=2048, end=206847, length=204800)
FAT: fat32
Cur size: 104857600
Min size: 35128832
Max size: 2000398934016
(104857600 / 1024 = 102400 KiB)
The boot partition
1
2
3
4
5
6
7
8
e2fsck -f /dev/nvme0n1p2
e2fsck 1.47.1 (20-May-2024)
Pass 1: Checking inodes, blocks, and sizes
Pass 2: Checking directory structure
Pass 3: Checking directory connectivity
Pass 4: Checking reference counts
Pass 5: Checking group summary information
/dev/nvme0n1p2: 358/154880 files (3.1% non-contiguous), 156958/640000 blocks
1
2
3
resize2fs /dev/nvme0n1p2
resize2fs 1.47.1 (20-May-2024)
The filesystem is already 640000 (4k) blocks long.  Nothing to do!
The LUKS partition
Now the fun part, I really appreciate this answer in Stackoverflow
1
2
cryptsetup luksOpen /dev/nvme0n1p3 crypt-volume
Enter passphrase for /dev/nvme0n1p3:
It is open:
1
2
3
4
5
6
7
nvme0n1           259:0    0   1.8T  0 disk
├─nvme0n1p1       259:5    0   100M  0 part
├─nvme0n1p2       259:6    0   2.4G  0 part
└─nvme0n1p3       259:7    0   1.8T  0 part
  └─crypt-volume  252:0    0   1.8T  0 crypt
    ├─debian-root 252:1    0  83.8G  0 lvm
    └─debian-home 252:2    0 645.1G  0 lvm
Looks like Rescuezilla knew this was a LUKS partition because the size was correct.
1
2
3
4
5
6
7
8
9
10
11
cryptsetup status crypt-volume
/dev/mapper/crypt-volume is active and is in use.
  type:    LUKS2
  cipher:  aes-xts-plain64
  keysize: 512 bits
  key location: keyring
  device:  /dev/nvme0n1p3
  sector size:  512
  offset:  32768 sectors
  size:    3901663232 sectors
  mode:    read/write
Some calculations:
((((3901663232 * 512) / 1024) / 1024) / 1024) / 1024 = 1.816
which is the right size of the partition in TiB.
So I only needed to change the LV.
1
2
3
4
5
6
7
8
9
root@ubuntu:/# vgs
  VG     #PV #LV #SN Attr   VSize    VFree
  debian   1   2   0 wz--n- <728.88g    0

root@ubuntu:/# vgchange -a n debian
0 logical volume(s) in volume group "debian" now active

cryptsetup luksClose crypt-volume
cryptsetup luksOpen /dev/nvme0n1p3 crypt-volume
To close the LUKS partition, the VG should be deactivated
1
2
3
# This step did nothing in my case, otherwise it would have expanded the LUKS and
# gets the free space on the partition.
cryptsetup resize crypt-volume
1
2
3
4
5
6
7
8
9
10
11
12
13
14
root@ubuntu:/# vgchange -a y debian
  2 logical volume(s) in volume group "debian" now active

root@ubuntu:/# pvs
  PV                       VG     Fmt  Attr PSize    PFree
  /dev/mapper/crypt-volume debian lvm2 a--  <728.88g    0

root@ubuntu:/# pvresize /dev/mapper/crypt-volume
  Physical volume "/dev/mapper/crypt-volume" changed
  1 physical volume(s) resized or updated / 0 physical volume(s) not resized

root@ubuntu:/# pvs
  PV                       VG     Fmt  Attr PSize  PFree
  /dev/mapper/crypt-volume debian lvm2 a--  <1.82t <1.11t
Resizing using an specific size:
1
2
3
lvresize -L 100G /dev/debian/root
  Size of logical volume debian/root changed from <83.82 GiB (21457 extents) to 100.00 GiB (25600 extents).
  Logical volume debian/root successfully resized.
Resizing using the free space of the whole volume group:
1
2
3
lvresize -l +100%FREE /dev/debian/home
  Size of logical volume debian/home changed from <645.06 GiB (165135 extents) to <1.72 TiB (450677 extents).
  Logical volume debian/home successfully resized.
Then lsblk showed:
1
2
3
4
└─nvme0n1p3       259:7    0   1.8T  0 part
  └─crypt-volume  252:0    0   1.8T  0 crypt
    ├─debian-root 252:1    0   100G  0 lvm
    └─debian-home 252:2    0   1.7T  0 lvm
Finally I needed to check and resize the filesystems.
I removed several lines and replaced them with
...to keep it short.
1
2
3
4
5
6
7
8
9
10
11
12
13
14
15
16
17
18
19
20
21
22
23
24
25
26
27
28
29
root@ubuntu:/# e2fsck -f /dev/mapper/debian-root
e2fsck 1.47.1 (20-May-2024)
Pass 1: Checking inodes, blocks, and sizes
Inode 4849689 extent tree (at level 1) could be shorter.  Optimize<y>? yes
...
Inode 4856185 extent tree (at level 1) could be narrower.  Optimize<y>? yes
Pass 1E: Optimizing extent trees
Pass 2: Checking directory structure
Pass 3: Checking directory connectivity
Pass 4: Checking reference counts
Pass 5: Checking group summary information

/dev/mapper/debian-root: ***** FILE SYSTEM WAS MODIFIED *****
/dev/mapper/debian-root: 485187/5496832 files (0.5% non-contiguous), 13627683/21971968 blocks

root@ubuntu:/# e2fsck -f /dev/mapper/debian-home
e2fsck 1.47.1 (20-May-2024)
Pass 1: Checking inodes, blocks, and sizes
Inode 1574716 extent tree (at level 1) could be narrower.  Optimize<y>? yes
...
Inode 41039976 extent tree (at level 1) could be shorter.  Optimize<y>? yes
Pass 1E: Optimizing extent trees
Pass 2: Checking directory structure
Pass 3: Checking directory connectivity
Pass 4: Checking reference counts
Pass 5: Checking group summary information

/dev/mapper/debian-home: ***** FILE SYSTEM WAS MODIFIED *****
/dev/mapper/debian-home: 893701/42278912 files (2.8% non-contiguous), 97611541/169098240 blocks
Note that I used another way to select the device, as it is a symbolic link.
1
2
3
4
5
6
7
8
9
root@ubuntu:/# resize2fs /dev/mapper/debian-root
resize2fs 1.47.1 (20-May-2024)
Resizing the filesystem on /dev/mapper/debian-root to 26214400 (4k) blocks.
The filesystem on /dev/mapper/debian-root is now 26214400 (4k) blocks long.

root@ubuntu:/# resize2fs /dev/mapper/debian-home
resize2fs 1.47.1 (20-May-2024)
Resizing the filesystem on /dev/mapper/debian-home to 461493248 (4k) blocks.
The filesystem on /dev/mapper/debian-home is now 461493248 (4k) blocks long.
Some tests
After the resize, I tested them:
1
2
3
mount /dev/mapper/debian-root /mnt/test/
root@ubuntu:/# ls /mnt/test/
bin  boot  dev  etc  home  initrd.img  initrd.img.old  lib  lib32  lib64  libx32  lost+found  media  mnt  opt  proc  root  run  sbin  srv  sys  tmp  usr  var  vmlinuz  vmlinuz.old
1
2
3
4
5
6
mount /dev/mapper/debian-home /mnt/test/
root@ubuntu:/# ls /mnt/test/
adolfo  lost+found

ls /mnt/test/adolfo/ansible-bootstrap/
playbook.yml  templates  test.yaml
Everything looked excellent!
Changing the UUID
Finally I needed to change the UUID of some of the old partitions partitions.
For /boot, we can use tune2fs (but first it would need to run e2fsck)
1
2
3
4
tune2fs -U random /dev/nvme1n1p4
tune2fs 1.47.1 (20-May-2024)
Setting the UUID on this filesystem could take some time.
Proceed anyway (or wait 5 seconds to proceed) ? (y,N) <proceeding>
For the old LUKS2 we need to generate an UUID first.
1
2
root@ubuntu:/# uuidgen -r
f8c54c68-5fe1-48c4-b7d5-026c7d4694fc
Next:
1
2
3
4
5
6
7
cryptsetup luksUUID --uuid=f8c54c68-5fe1-48c4-b7d5-026c7d4694fc /dev/nvme1n1p5

WARNING!
========
Do you really want to change UUID of device?

Are you sure? (Type 'yes' in capital letters): YES
It looked like this:
1
2
3
4
5
6
7
8
9
10
11
12
nvme0n1
├─nvme0n1p1      vfat        FAT32                        CA0E-4D9E
├─nvme0n1p2      ext4        1.0                          1142f508-b892-4bca-b0cc-ab1accdf9db9
└─nvme0n1p3      crypto_LUKS 2                            2a659480-bf29-4944-9d52-6d078bdfd346
  └─crypt-volume LVM2_member LVM2 001                     bPQHVr-kxof-cEZL-0eDN-XYEd-tYQY-PJBY6a
nvme1n1
├─nvme1n1p1      vfat        FAT32                        CA0E-4D9E
├─nvme1n1p2
├─nvme1n1p3      ntfs                                     D2A60EAEA60E92E1
├─nvme1n1p4      ext4        1.0                          7373f983-2ec7-4f56-9866-f82607d4bc61
├─nvme1n1p5      crypto_LUKS 2                            f8c54c68-5fe1-48c4-b7d5-026c7d4694fc
└─nvme1n1p6      ntfs                                     F44234364233FC44
The old partitions won’t be pick up at boot as they looks different.
Now if everythig was correct, my PC should have be able to boot without caring about which disk it uses, as grub would choose the new /boot and the booting process would try to unlock the new LUKS.
Result
Well, it couldn’t boot from the new disk but the old one. At least I was right about that didn’t matter which disk it uses, the system would boot.
1
2
3
4
5
6
7
8
9
10
11
12
13
14
15
16
lsblk
NAME                MAJ:MIN RM   SIZE RO TYPE  MOUNTPOINTS
nvme0n1             259:0    0   1.8T  0 disk
├─nvme0n1p1         259:1    0   100M  0 part
├─nvme0n1p2         259:2    0   2.4G  0 part  /boot
└─nvme0n1p3         259:3    0   1.8T  0 part
  └─nvme0n1p5_crypt 253:0    0   1.8T  0 crypt
    ├─debian-root   253:1    0   100G  0 lvm   /
    └─debian-home   253:2    0   1.7T  0 lvm   /home
nvme1n1             259:4    0 931.5G  0 disk
├─nvme1n1p1         259:5    0   100M  0 part  /boot/efi
├─nvme1n1p2         259:6    0    16M  0 part
├─nvme1n1p3         259:7    0   200G  0 part
├─nvme1n1p4         259:8    0     2G  0 part
├─nvme1n1p5         259:9    0 728.9G  0 part
└─nvme1n1p6         259:10   0   509M  0 part
I was pretty sure the problem was grub wasn’t installed correctly, so I retried that.
First I needed the line
1
GRUB_DISABLE_OS_PROBER=false
in my /etc/default/grub because I wanted grub to detect Windows automatically.
Then I unmounted the old EFI partition and mounted the new one.
1
2
adolfo@debian-desktop:~/Projects/webpage$ sudo umount /boot/efi
adolfo@debian-desktop:~/Projects/webpage$ sudo mount /dev/nvme0n1p1 /boot/efi
I reinstalled grub.
1
2
3
sudo grub-install --efi-directory=/boot/efi /dev/nvme0n1
Installing for x86_64-efi platform.
Installation finished. No error reported.
Yeah, it worked, but it was still mounting the old partition.
I checked a couple of things and my /etc/fstab mounts /boot/efi using UUID, and
I didn’t change the UUID for that partition. That was the issue.
I installed the mtools to use mlabel command3.
First I was sure the partition was unmounted, then I ran:
1
mlabel -N CA0E5D9E -i /dev/nvme1n1p1 ::
I wasn’t sure how those label are created, so I just picked up the original and changed one character.
Now it works as expected, and that’s how I started to use my new disk.
Extra
I booted on Windows and from there I modified its partition to use the whole disk.
I have used AOMEI Partition Assistant Standard and I liked.
You can download it here
After the installation the first screen is this one:
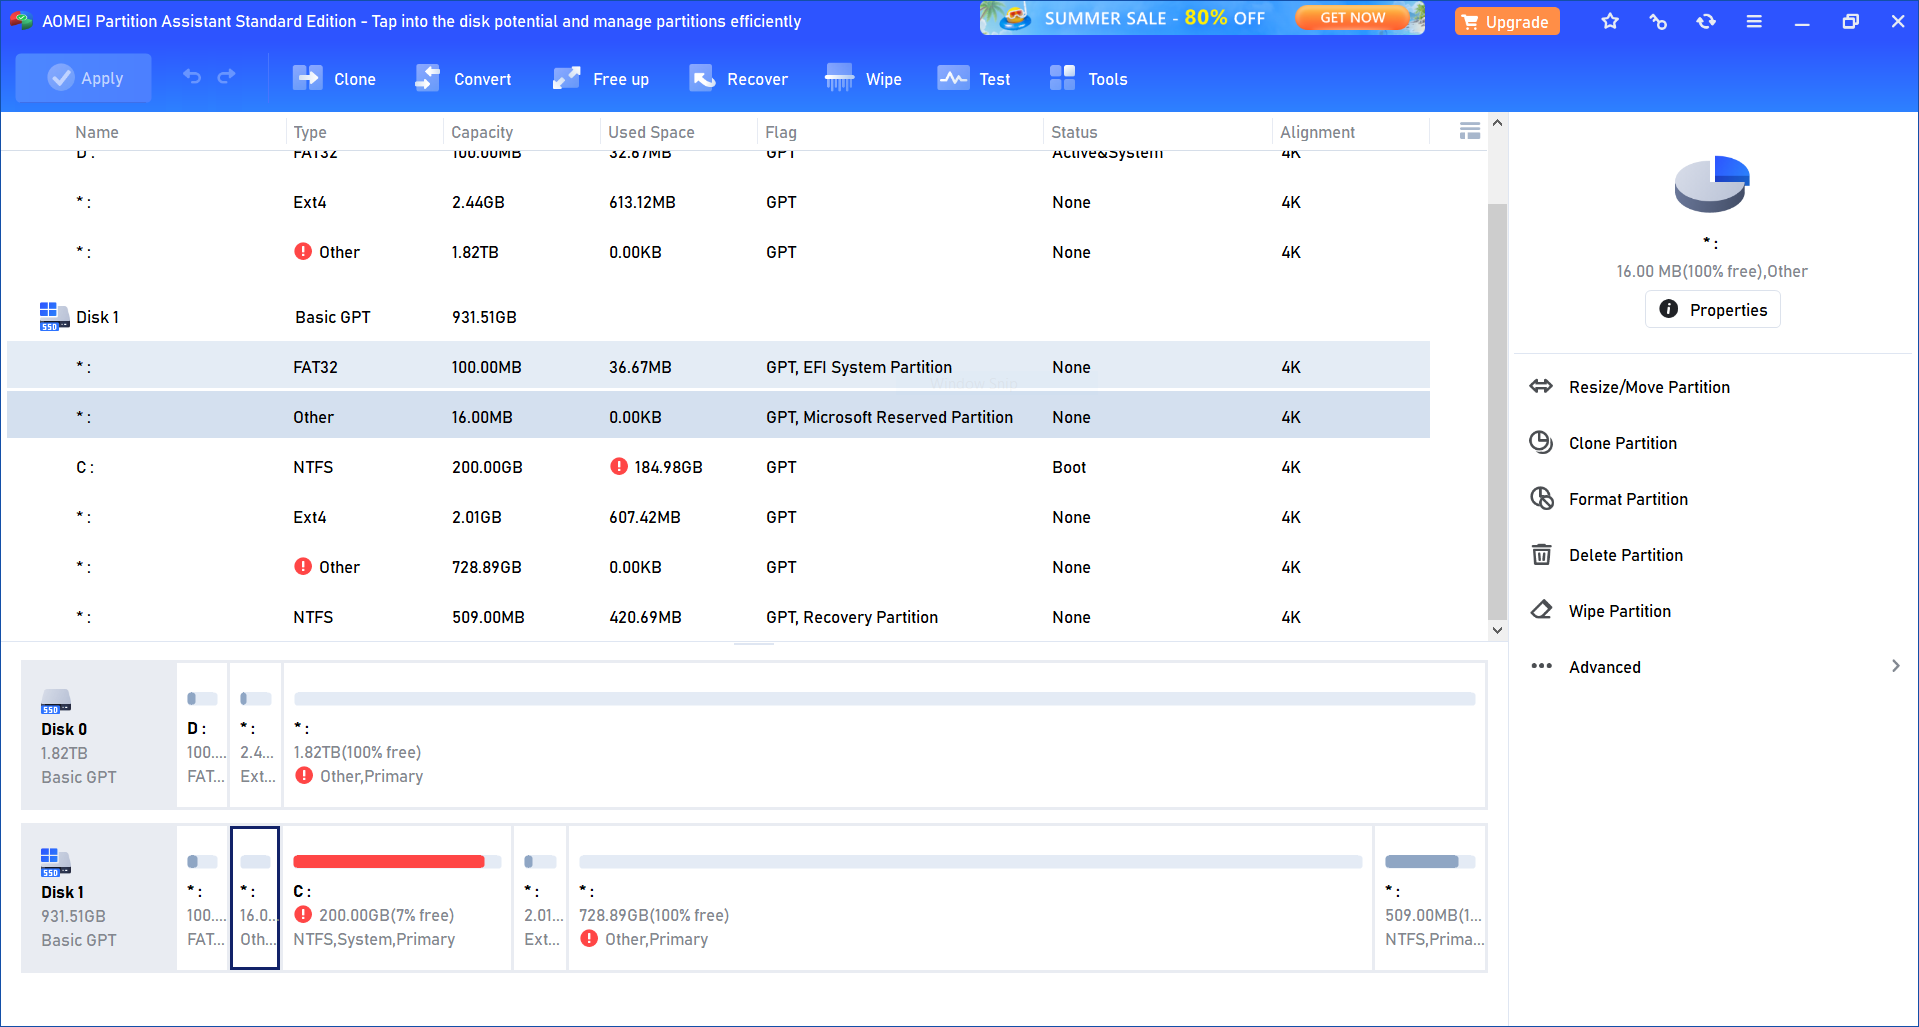 AOMEI first menu
Now to delete a partition, just click it and the option would be on the right column.
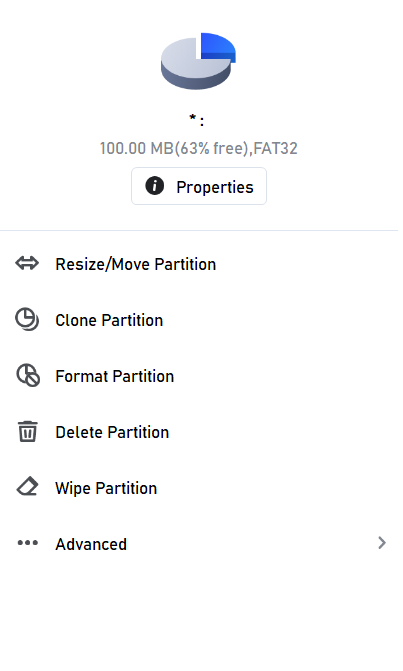 Options column
I deleted the old EFI, /boot and LUKS; then I will move the C: partition and extend it.
After deleting, moving, and merging, the disk looked like this.
 Final partitions in the old disk
Now I applied the changes. I chose to Restart into Windows PE mode when it asked me.
I had issues restarting into the Windows PE mode, basically UEFI was selecting the wrong disk and Windows was booting normally. After a couple of tries, I selected the other disk and the PE mode started.
Final lsblk
1
2
3
4
5
6
7
8
9
10
11
12
13
adolfo@debian-desktop:~$ lsblk
NAME                MAJ:MIN RM   SIZE RO TYPE  MOUNTPOINTS
nvme0n1             259:0    0   1.8T  0 disk
├─nvme0n1p1         259:2    0   100M  0 part  /boot/efi
├─nvme0n1p2         259:3    0   2.4G  0 part  /boot
└─nvme0n1p3         259:4    0   1.8T  0 part
  └─nvme0n1p5_crypt 253:0    0   1.8T  0 crypt
    ├─debian-root   253:1    0   100G  0 lvm   /
    └─debian-home   253:2    0   1.7T  0 lvm   /home
nvme1n1             259:1    0 931.5G  0 disk
├─nvme1n1p1         259:5    0    16M  0 part
├─nvme1n1p2         259:6    0   931G  0 part
└─nvme1n1p3         259:7    0   509M  0 part