Installing Pi-hole in my raspberry pi
Due to the high number of obnoxious ads in modern internet, I decided to block as much as I can at a DNS level using Pi-hole in my RPi.
DNS (Domain Name System) is the one that allow us to use www.google.com instead of 142.251.41.68. Basically it translate domains names (like facebook.com) to IP address (like 31.13.80.36), so we don’t have to remember a bunch of numbers.
Installing it
It is pretty easy actually. You only have to run
1
curl -sSL https://install.pi-hole.net | bash
And then, go through the questions in the terminal.
Running a random bash script from internet could be dangerous. Don’t do it if you don’t trust the person (or group) that is providing it. In that case it is better to download it and verify first before running it.
In my case, I chose the default for everything and the Cloudflare servers as my upstream DNS.
Post-Installation
Change the password
During the installation, a new password for the web interface is showed. If you missed it, a new
password can be generated running pihole -a -p
Networking settings
Pi-hole can serve as DHCP, this is helpful to be sure all the hosts in the network are using Pi-hole as DNS. I wanted to enable it and set an static lease for my RPi and my modem/router. That can be done easily using the admin interface:
DHCP (Dynamic Host Configuration Protocol) is a protocol that assigns IP address (and other networking settings like DNS) to hosts that are just connecting to a network. This way it is not required anymore to set manually such settings to connect a computer.
- In left bar, click on Settings
-
On the top, click on the DHCP tab.
- On DHCP Settings:
- DHCP server enabled is unchecked (it will be enabled in the last step)
- Set the range, in my case
from: 192.168.2.1 to 192.168.2.254(this is the range of possible IP address that the DHCP can assign) - Set the gateway, in my case
192.168.2.1
-
On Static DHCP leases configuration
I write the MAC address, the current IP address and as hostname “raspberry-pi” and click in the “plus” button to the right.
I did the same for my router, but hostname is “steve” (for some reason, that is how my ISP calls this model).
- On DHCP Settings:
-
Set and static IP to my raspberry pi. During the installation it was told that Pi-hole needs an static IP and a static lease in a DHCP will work, however as in my case Pi-hole is also the DHCP server, I need to set an static IP manually.
I set an static lease for my rpi in step 2.2 to be sure the DHCP server doesn’t assign the same IP to another host.
To do this, you only need to modify a file in
/etc/network/interfaces.d/in my case that file iseth0and it ended looking like this:1 2 3 4 5
auto eth0 iface eth0 inet static address 192.168.2.20/24 gateway 192.168.2.1 iface eth0 inet6 autoPretty simple, an address and its netmask with its gateway. IPv6 is still handled automatically.
- Enable the DHCP using the web interface.
- Disable the DHCP on my router. (I can not give much details here as there is too many different routers/modem given by the ISP in different countries. But it should be somewhere around Network Settings )
- The last step is to make sure the RPi is using the Pi-hole DNS. To do this, modify its
/etc/resolv.conffile to something like this:1 2 3
domain lan search lan nameserver 192.168.2.20the lan in domain and search can be changed, you only to be sure it matchs the Pi-hole domain name setting, which you can modified in the Pi-hole DHCP settings.
Now everything is set, all the things connected to my network will use the Pi-hole as DNS and I will see a lot less ads as consequence.
You can add additional blocklists (or use another one) to Pi-hole: In the left, click on Adlist, now you can write the URL that has the blocklist and a comment, then click on Add. At the bottom you can enable or disable any blocklist. Finally, you need to update list of blocked domains, on the left, click on Tools, then click on Update Gravity and now click on the Update buttom.
How it works:
What Pi-hole does is to return an special IP address (0.0.0.0) 1 which mean this host on this network, thus making any request unroutable.
Let’s see the difference:
sequenceDiagram
title Normal scenario
    participant My Computer
    participant ISP DNS
    participant Internet
    My Computer->>ISP DNS: I want to visit facebook.com
    ISP DNS->>My Computer: facebook.com is 31.13.80.36
    My Computer ->> Internet: Request to 31.13.80.36
    Internet ->> My Computer: Here you go
Now, that sequence would happen when you when the browser shows you an ad. It needs first the IP address of the server who has the ad to request it.
But now Pi-hole will return an invalid address.
sequenceDiagram
title Pi-hole scenario
    participant My Computer
    participant Pi-hole
    participant Internet
    My Computer->>Pi-hole: I want to visit trackingads.com
    Pi-hole->>My Computer: trackingads.com is "0.0.0.0"
    My Computer ->> My Computer: Can not connect, nothing to show
Real example
If I visit www.cnn.com I can see the following errors in Firefox:
 Errors in Firefox network monitor
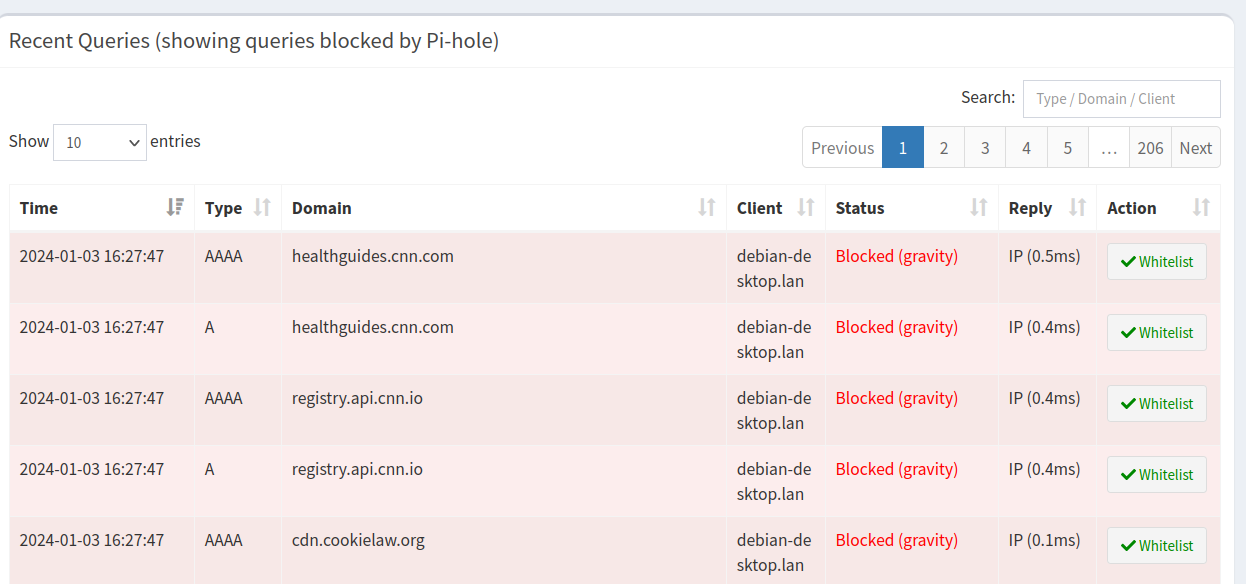
And we can verify those in the Pi-hole logs
